About Me

My photo
I was born in Pretoria, South Africa in 1991. I lived there for 16 years before my dad got offered a job in Norfolk, Virginia in the United States. I immigrated to the States with an open mind set and ready to take on a new life. I was pushed back a year and retook ninth grade in a new langauge. I am currently a Sophmore at Virginia Tech and i am studying to become a Construction Manager.

Saturday, December 10, 2011

Parking Garage.

The parking garage had made a lot of progress since the last time I visit. There was a lot going on and it was hard to take everything in.  First, I am going to post my information that I collected and then I will go into more details about the site.
Above, I have listed all the equipment and contractors that were on site.  The first activity that I experienced was watching Long Foundation and Drilling company drill caissons.  It was interesting because they had a water truck stand right next to the big drill.  I have never seen them do that.  The workers would pour water down the hole (that was being drilled) and then they would pour water onto the drill bit.  Once the drill was drilling water was still being poured.  I am assuming they are drilling into bedrock and because of that the drill bit is getting extremely hot.  The other thing could be that the water is moistening the ground but I don't see how that makes sense if they are using a machined engineered for these situations. I am going to attach some pictures of the scene.

Figure 1                                                                   Figure 2

                          Figure 3                                                     


                             Figure 4

In Figure 2 you see the workers pouring water down the hole and Figure 3 shows water being poured on the drill bit.  In the center of Figure 4 the crawler crane is maneuvering the winch towards the workers.

Another activity included two excavators moving rocks around.  Some rocks were piled and others were spread around in a big hole.  The excavators were located in the middle of the construction site.  See Figures 5-9.


                      Figure 5
                                                                                                                                 Figure 6


                                                                                                Figure 7

                                                                                                                               Figure 8


                                                                                                                              Figure 9


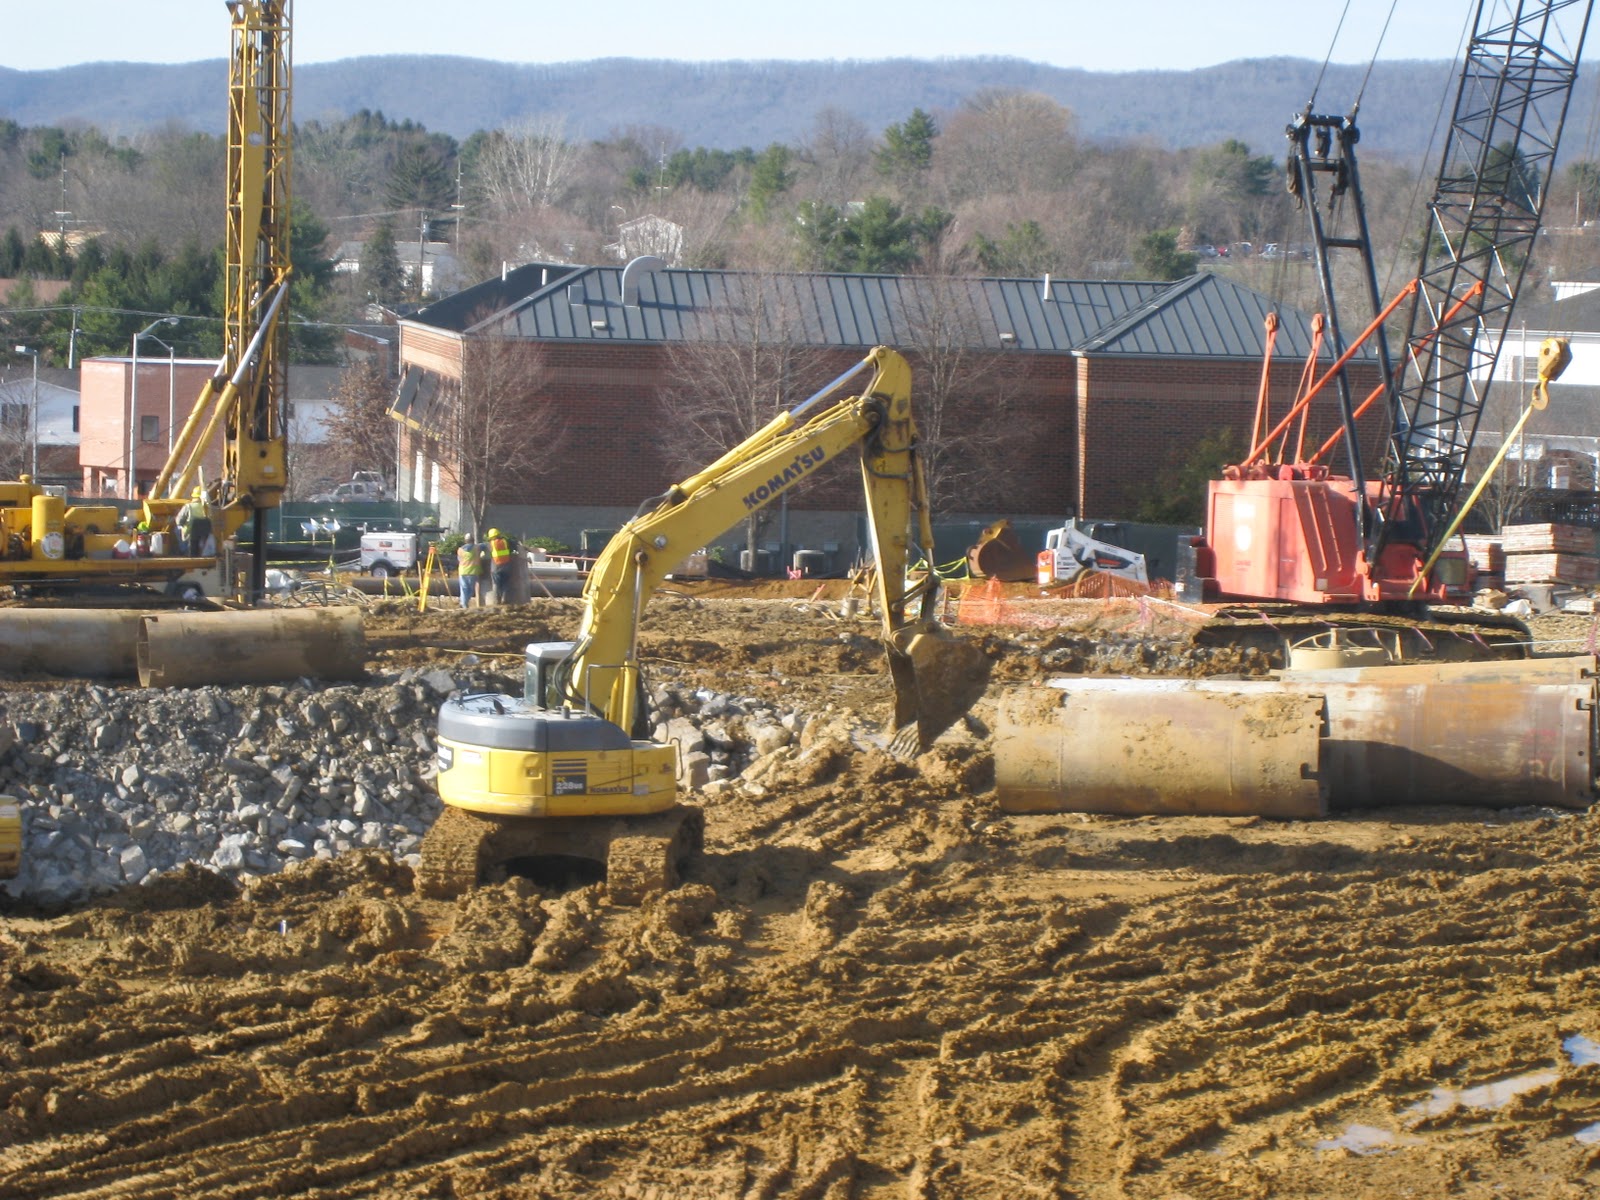
Figure 5, shows the location of the excavators.  Figure 5, also shows the caisson drill in the background. Figure 6, shows the excavator extending towards the edge of the hole and pulling rocks and soil towards him.  Figure 8, shows the other excavator moving around rocks, and Figure 9 shows the excavator turning around.  The excavator in Figure 9 placed his bucket on the soil and waited for the other excavator to finish.

Another interesting activity that I observed was formwork and the installation of rebar cages. I want to show what I have learned in my Construction Principles class about reinforcing columns:                              
Figure 10

Figure 10 is how most columns are reinforced.  At the bottom of the column you can see a lot of rebar.  This is called lab splicing (Figure 12).  In a previous class we discussed what the significance of reinforcing steal is.  The reinforcing adds strength to concrete and prevents concrete from cracking.  It is also important to know that a certain amount of concrete is needed to protect the steal from corroding.  The tall reinforcing steal you see in Figure 10 is a reinforcing cage.  It is very similar to the cages that is used in beams. See figure 11.

Figure 11. 


Figure 12

Now, that I have explained some details I will show what I saw on site.

                  Figure 13.                                                                                Figure 14
Figure 15

Figure 13, shows a fork lift maneuvering a reinforced cage.  Figure 14, shows a worker guiding the cage into place and Figure 15 shows the cage set in place.  Another thing to note in Figure 14 is the reinforcing along the formwork (Figure 14).

I want to show images of the formwork.  In a previous blog, Pouring Concrete, I explained the basics of forming a pathway.  Now, we have formwork for a wall.  In the same Construction Principles class we learned about reinforcing a wall and then placing the formwork around it.  In the picture below (showed to us in class) workers are busy with the second layer of formwork for the wall.

Figure 16

Below, are some pictures showing the first layer of the formwork.  The images also show how the formwork was tied together.


I hope you are enjoying all the images and details. 
Thank you for reading.
All the best,
Mic


Friday, December 9, 2011

Delays for Castle's Kettle and Pub

After the devastating day the Virginia Tech community went through yesterday, the Hokies reunited in remembrance of our lost officer..  Today we will have a vigil for Officer Crouse and we will give his family the Hokie love and support they deserve.

It was not just the Virginia Tech students that felt the significance of yesterday but Joe, At Castle's Kettle and Pub was feeling the same emotions.  I spoke to Joe, an Virginia Tech alumni, today and he cancelled his inspections and deliveries for the day, because Joe cancelled inspections he has to wait until Monday.  This means Joe looses 2 days of work.  Without the neccessary inspection he can not proceed with the insulation and drywall.  Joe has all the materials for the drywall just laying on the main floor. The images below shows what the main floor looks like.


The only person doing work on the site was Andrew, the executive chef.  Andrew was outside doing the stone work to the front of the building. See Figure 1.

Figure 1 
I did see a few things though.  In Figure 2 you will see the insulation that they sprayed in the roof.  The insulation is like a foam.  It is prayed just like paint but once it is sprayed it takes a few seconds to expand a 100 times bigger.  In Figure 3 you will see the insulation that was placed in the walls downstairs.  The significance of insulation is that it keeps heat from escaping the building and since heat does not ecsape your heating bill will decrease significantly.  

                  Figure 2.                                            Figure 3
 

Joe and I also talked about what he was doing on the side of the Pub (Shown in images below)
   
                                Figure 4                                                   Figure 5


As you can see in Figure 4 and 5 Joe has installed posts next to the Pub.  These posts are there because in between the post and the building the HVAC units will be installed.  The posts will be cut to the height of the door because of building requirements (only a certain percantage of the side of the house can be covered before it is considered a indoor room).  The posts will be constructed into a fence.  The fense will be there to hide the HVAC unit. 

The other thing Joe and I talked about was the deck that was installed.  He said that the deck was not well designed because of two reasons.  One, there was one post that is almost in the doorway. Two, the stairs had to be relocated to avoid the traffic of people going through the outside seating area.  He did not seem very happy about it but he said that in construction you need to be flexible to make changes as you go. 

In Figure 6 you see Joe's first problem.

Figure 6

Joe explained that if the deck was designed right then the furthest post would be alligned with the post of the house (which is blocked by the 2de post) to make the seating area sqaure.

The last thing I observed before I left was a delivery.  Earlier while I was talking to Joe he said that he was expecting a delivery and it hasn't come yet. As I left at 3:00pm the lumber delivery arrived. The employee parked the truck in the turn lane, and then used a loader to lift and move the lumber on site.  Below are images of the scene.


Once again I enjoyed talking to Joe.  Joe and his crew has been very helpful in answering any questions that I have had.

I hope you enjoyed my reports.
All the best,
Mic.

A moment of silence.

Today is a very heartbreaking day for the Virginia Tech community.  One of our officers that swore to protect us lost his life in duty.  He was gunned down after he pulled over a Virginia Tech student for breaking a traffic violation.  The gunman later took his own life.  My heart goes out to Mr. Deriek Crouse's friends and family.  I will always give thanks for what Mr. Crouse has done for Virginia Tech.  Rest in peace, you will never be forgotten. You will forever be a Hokie in my heart.

I send all my love to his family.  I also want to thank my family and friends for checking up on me.

ALL MY LOVE
MICHELE MINICHIELLO

Castl's Kettle and Pub

Before I start I want to provide information that I collected on the site.

In the table above you can see everything that went on at the site.  The Kesler crew was finishing up the roof.  They were off of the roof within 15 minutes of my arrival.  The ATR Construction crew was inside rearanging materials so they can get ready for insulating the walls and installing the drywall after.  But before they can start on all that the fire department has to come do their inspection.  As I stated in my report the concrete crew was pressure washing the stamped concrete.  The reason they use the pressure washer is so that they can get all the dirt out of the grooves and also give the concrete a cleaner look (Figure 1)

                                                                             Figure 1

Just around the corner from where the concrete crew was working the executive chef for Castle's Kettle and Pub was finishing center block's with Virginia blue stone (Figure 2).  The Virginia blue stone comes in various odd shapes and sizes and the biggest challenge is to place these stones in a pattern that looks nice.  The blue stone is used to make the building look nicer and well rounded.  Andrew Wagoner, the executive chef told me that, " [they] had problems with getting a subcontractor in and [the subcontractor] was charging [them] way to much money".  He also said that " he has done it before so why not do it himself and save Joe a little money".  So Andrew grabbed a wheel barrow, mixed concrete and started to add the stone to the center block. Here is Andrew hard at work,
                  
                                                                                                               Figure 2
 
Andrew would just take a scoop full of cement, spread it on the center blocks, and then pick out a stone that looked like it fit the pattern (Figure 2).

In my Construction Principles class we learned that natural stone such as polished granite, limestone, marble, slate, and sandstone are all types of stone that is used to finish buildings.  The stone provides texture, color, and uniqueness to a building.  I would classify the stone pattern to be a random rubble pattern because the stones are all different shapes and sizes.

This is all I have for now.  Check in later for more construction reports.
Thank you for reading.

All the best
Mic

Pouring Concrete.

Today Blacksburg has allowed construction to continue along without delayes.  Blacksburg is so unpredictable with the weather, you never know when a random storm will come through and flood the town.  Today at 9am it was about 54 degrees.  It is not the greatest conditions to pour concrete but it is good enough for Joe, the owner of Castle's Kettle and Pub.  The schedule is very tight and construction had to continue.  Joe scheduled for the concrete truck and crew to come.  I am not sure who did the formwork for the walk way because I got to the site and it was already installed (Figure 1 and 2)

                Figure 1                                                               Figure 2

As you can see in Figure 1 and 2 the aggregate (crushed limestone) was already laid down along with the formwork.  The significance of the formwork is to box in the concrete.

Just to show you another way to look at formwork (Example).  I saw this in my Construction Principles class and it helped me understand.

Example.
Once the concrete truck showed up, the Fenseca Concrete crew laid down the reinforced steel.  The reinforced steel came in a pre manufactured square of wire, almost like a mesh (Figure 3). The reinforcement keeps the concrete from cracking, and increases the tensile strength of the concrete.  After the wire mesh was laid out, the concrete truck started pouring concrete into wheel barrows.  There were one worker who just walked concrete up and down.  The concrete was then poured out of the wheel barrows and into the formed pathway. See Figure 3.

Figure 3


There was another worker dedicated to spread out the concrete so that it was close to being level to the formwork. In my experience with pouring concrete I was told to add wooden "stubs" through out the area.  These stubs were just a little lower than the formwork.  The reason for the stubs is for when you pour the concrete you can see how far you are from being level.  However, the Fenseca Crew did not do this.  I added that detail because for a bigger jog, such as a driveway, you could use this.  I think the reason the crew did not use extra stubs is because the pathways was narrow enough for them to use a long pieces of lumber to screed the concrete.  Screeding is when you are using a flat piece of lumber or aluminum to get the proper grade or slope for the concrete.  In Figure 4 below you can see what it looks like to screed the concrete.

Figure 4


Once the person screeded the concrete another worker floated the concrete, as you shown in Figure 5.  Floating concrete is when you smoothen/ finish the concrete.  The most common tool used to float concrete is a bull float (Figure 5)

Figure 5


After the whole pathway was floated the concrete was left to dry for several hours.  Once the concrete was dry enough so that a worker could apply a portion of his weight the stamping began.  It was actually very interesting to watch.  The crew member would use this rubber mat and place it on the concrete and then place the other around it just like puzzles.  Once the mats where placed the workers would apply pressure on it so the mat would imprint the concrete. See Figure 6.  

Figure 6


As you can tell through these blogs Castle's Kettle and Pub is really coming along.  A lot of things that I am learning in class I am seeing here.  In class we learned that concrete is a combination of Portland cement, aggregate and water.  We also learned that there is different types of aggregate that can be used such as course (crushed stone or gravel) and fine( sand) aggregate.  In good concrete you want a combination of both.  The nice thing about concrete is that it is easy to work with, it is strong and very durable.

I hope you enjoyed the blog, and all the details.
Thank you for ready and all the best,
Mic

The porch...

I promised my mother that I would only be a away a little while and that I would be back in time for a family lunch.  I met up with GGH construction again after spending two half days with them already.  I wouldn't have gone back if I was not so determined to learn something else from my friend, Gabe.  In my Construction Principle's class my TA, Ellie lectured about light wood framing.

I drove to South Plaza Road, Virginia Beach, at 7:30 in the morning to see the last bit of the porch before I had to head back home.  Like before we had our morning meeting and determined that we had to set up our work benches, uncover piles of lumber, and get the equipment from Gabe's truck.

We started where we left off the day before. See previous blog, "Framing the porch roof", for more information.  We cut rafters to fit the existing roof and the 6X4 head board.  After we were done with the rafters it was time to add the plywood to complete the roof top.  We started on the right side of the building and worked our way to the left.  We did this so that we could cut a minimum amount of plywood to make up for the L shaped corner. Figure 1 and 2 show what the proch looked like after the plywood was installed.

                 Figure 1                                         Figure 2

                                        
The next thing to do was add aluminum brackets to the rafters and 6X4 joist (See Figure 3 and 4). Figure 5 shows what the roof looks life from the beneath.

Figure 3                                                            Figure 4                                            


           Figure 5


After the brackets were screwed in we added a sill plate to the ceiling joist. The sill plate consisted of a 1 inch in depth by 4 inches in with (1X4) piece of lumber.  Once the roof was insulated the ceiling would be installed and the sill plate provide something to nail the ceiling too.

Figure 6                                             Figure 7

Figure 8                                                     Figure 9

Figure 10  

    In Figure 6 you can see the first 1X4 sill plate was attached.  Figure 8 and 10 shows how the corners and pieces in between were done.  Figure 7 and 9 shows a more zoomed out view of what everything looked like. 

I hope you enjoyed the blog and that you had a wonderful thanksgiving.


All the best,
Mic